Monday, 29 April 2013
Scene 2
For scene 2 - I had to create a new building, add a dome for the sky and import the spinner vehicle
I had to flip the image on the dome to show on the inside- in editable poly uner edit polygons.
I practised with lighting using the omni lights to create some shadows on the buildings, I wanted a shadow of the vehicle to show on the building as it went accross but my vehicles would have caused too large a shadow.

I was not happy with the effect so I added a floor to help capture the light, moved the lights into a better position and made the dome smaller to get a better effect from the map.
I had to flip the image on the dome to show on the inside- in editable poly uner edit polygons.
I practised with lighting using the omni lights to create some shadows on the buildings, I wanted a shadow of the vehicle to show on the building as it went accross but my vehicles would have caused too large a shadow.

Testing the lignting using omni and atmospheres and effects
using selecting volume light
Attached an omi light to the vehicleI was not happy with the effect so I added a floor to help capture the light, moved the lights into a better position and made the dome smaller to get a better effect from the map.
File Structure
I restructured my files for the final animation to allow me to know where images for maps, sound files and video files can be accessed without confusion.
 I have place the jpg files in the texture folders, this means file links are not lost on importing/merging models into new scenes.

Thursday, 25 April 2013
Blinking lights
blinking lights
To create blinking lights to loop on the car and import that repeated animation into another file I followed this tutorial:
CJCA915, Chris's Corner, Blinking Lights in 3ds Max, [online]available at
http://www.youtube.com/watch?v=ROGe9U9KNOY Accessed : 25/04/13
To create this blinking effect the lighted areas on the vehicle were given the brightest settings and key frames were created on the time line at intervals of 20 seconds, starting at 0.

Going back to the timeline and moving to the 10 second interval the settings were changed on the opacity within the motion editor for the mode that was assigned to the lighted areas on the vehicle. A key frames was then created - this was then repeated for each further 20 second intervals ie: 30, 50 etc.

I feel that this is not a very good way of producing a flashing light as the opacity setting will allow the background to be seen through the selected area.
But for this video the vehicle is moving too fast for the viewer to see the opacity created on the lighted areas and therefore it is not that noticeable.
Slate Material Editor

I have been using the slate material editor with more confidence along with the select by name option on the toolbar to assign different maps to named parts in the scene.
I
Reactor

To use the reactor option : bring up the reactor toolbar
(right click on edge of main toolbar) or click on the hammer and choose reactor
On the reactor tool bar there a many option to play with the
first is using the rigid body collection (building blocks)
I have drawn 2 rectangles and 2 spheres the aim is to have
the spheres fall and run down the planks, the larger sphere will react
differently to the smaller sphere.


Tuesday, 9 April 2013
Creating scene one landscape and explosions
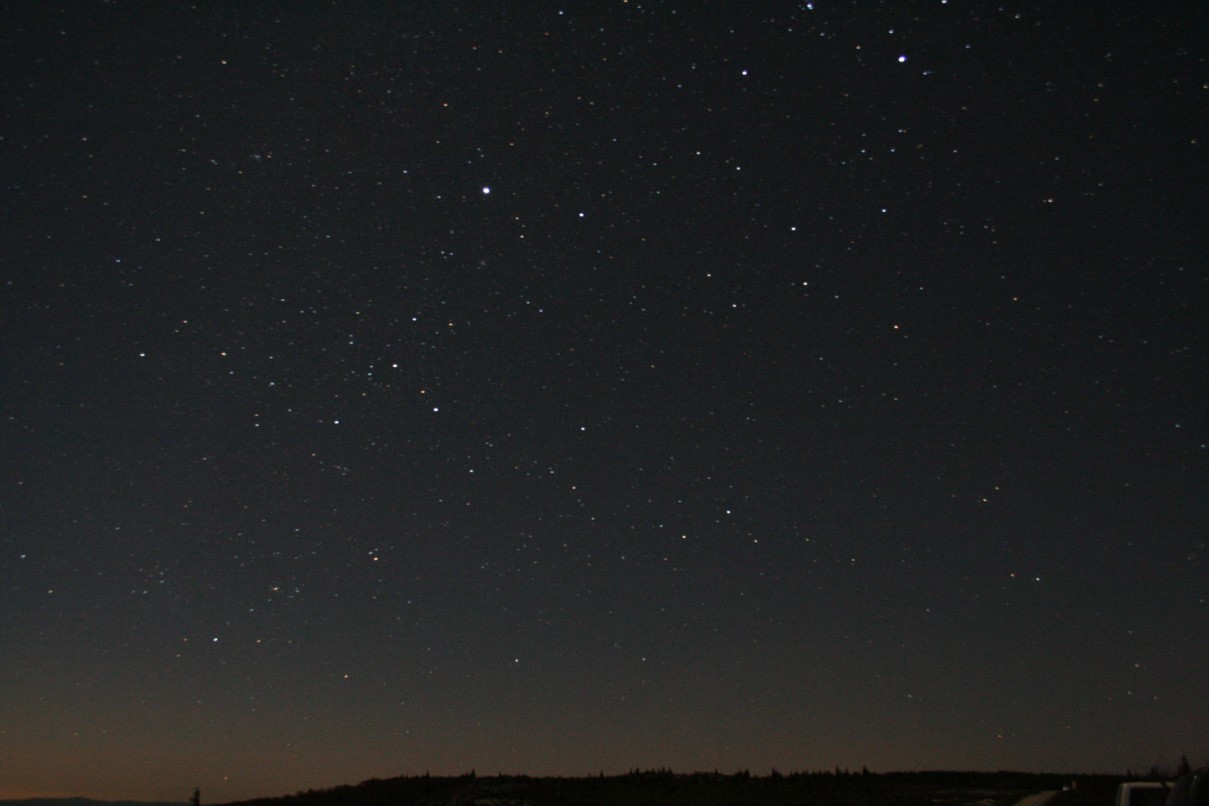
I have found a night sky jpeg that I could test the enviroment map with from wikimedia commons
 Wikimedia Commons, 2006, File:Mountain night sky - West Virginia - ForestWander.jpg, available at : http://upload.wikimedia.org/wikipedia/commons/3/3f/Mountain_night_sky_-_West_Virginia_-_ForestWander.jpg, Accessed 21/3/2013
 By creating a sphere and deleting half, then deleting the bottom part to give a straight line to act as a horizon line, a bitmap sky scene could be assigned to it

The bitmap image automatically shows on the outside for the inside the flip option is required.
 For this scene I created some cones to act as a sort of chimney which will have explosion from the top(above)
(below) a spline was created for the vehicle to follow on a path constraint.
This was extremely difficult to draw as a free hand object, but I was able to manipulate the line into a more curved shape.


For the explosions I followed my tutorial notes see explosions and fire.

I have added a camera to view the render and add a slightly pan to give more depth to this part of the animation

the bottom two views are on the left camera 1 and on the right perspective.
I have changed the animation to set the speed of the asteroid and added a pan to camera 1.
My output settings are HDTV 1280 x 720 25 fps


The bitmap image automatically shows on the outside for the inside the flip option is required.

(below) a spline was created for the vehicle to follow on a path constraint.
This was extremely difficult to draw as a free hand object, but I was able to manipulate the line into a more curved shape.


For the explosions I followed my tutorial notes see explosions and fire.

I have added a camera to view the render and add a slightly pan to give more depth to this part of the animation

the bottom two views are on the left camera 1 and on the right perspective.
I have changed the animation to set the speed of the asteroid and added a pan to camera 1.
My output settings are HDTV 1280 x 720 25 fps
Subscribe to:
Comments (Atom)