Thursday, 9 May 2013

Critical Evaluation


The final animation is a good reflection of my original storyboard, I did however make some changes to scene 3 as my original idea did not showcase the neon lights and I wanted the camera to move through the cage of the neons.

Scene 1, the explosions using the fire effect and superspray could have been manipulated further using the partical view and the path of the vehicle would have been better if I used a dummy to follow the path constraint, unfortunately I learnt this later on in the project.

The speed of the vehicle is a little fast and I did have problems with the two scenes matching together therefore I used the fade out to join the files together, the flashing of the yellow and lights on the vehicle do not work, the opacity that I used works very well in showing the background through the vehicle, unfortunately this was not the effect I wanted.  The sound works well with the explosions and fits with the original film.

Scene 2, I included another vehicle to add more interest to the scene, I was unable to add a shadow but this would have been a good effect to have.  The sound effects of the vehicle being close to the camera works well.

Scene 3, I think the camera angles of this scene and the glow on the building and neons work very well, although as anticipated there are some gaps in the building.  The words in the neon do not spin as smoothly as I would have liked but overall I am satisfied with this scene.  I did try to incorporate some smoke within this scene but this corrupted the file, so was not included within the final scene.

Overall I feel that the animation does reflect the opening scenes in the Bladerunner movie, and follow the storyboard. The models have a cartoon element about them that works well in this animation along with the colours and maps.  I feel I have incorporated some good techniques at my first attempt at 3d animation.

Final Output

The final settings for out put :


I have selected H.264 with a preset of HDTV 720p 23.976 High Quality, I changed the frame rate to equal the frame rate of the movie files (29.97) then changed the aspect ratio to square pixels.

Output to MP4


Monday, 6 May 2013

Camera Angles

I am finding playing with the camera angles more fun than I have the rest of this module.  It is difficult at first to get my mind around what I am viewing when moving the cameras, but now I have practised more I am finding it easier to manipulate them.

I have used the target camera and placed the target on a point that I need to be within the camera view at all times

Here are some view different camera angles I have tried:


This screen shot shows the two cameras and their views in the two left hand viewports

Rendering, Premier pro and editing the animations

This link show a montage of clips from the Bladerunner movie

http://www.youtube.com/watch?v=3VgNoKc_Gdw

My final animation includes my attempts to replicate some of the scenes.

I imported the .avi files that have been rendered out of 3DSmax so that I can work with the scenes and add the sound effects, using .avi files adds a compressor so the quality in premier is not as high quality as I would have liked.

I had a one to one tutorial and was shown to render the files as image files, this takes longer but the quality is of a higher standard,

Settings I have selected :

3DS Max :  HDV 1280 x 720  25fps

render out as image files   
I am using targa and in the settings selecting 24 to include the background,
use 30 to have the background transparent.

Setting in Premier pro : the files imported easily and could be edited as normal.  Because I had smaller files of the same scene on different time spans I could match them and layer them together.

I included a title introduction using the text option in PremierPro selecting colour and effect to reflect a style similar to the bladerunner text in the movie.

I added the original sound track from the title scene in Bladerunner

Vangelis,2005, Bladerunner main titles (track1)[online] available at:
http://www.last.fm/music/Vangelis/Blade+Runner/Main+Titles+(From+%22Blade+Runner%22) published 5/7/2005, (accessed 2/5/2013)

This was edited to use the different sounds available to give parts of the video a stronger effect.  The sounds are layered, adding a diffuse when required to balance out the final soundtrack.


The sound of the explosions are edited to match the image explosions. 


Thursday, 2 May 2013

Scene 3

To set up scene 3 I needed to create an animation with the neon lights befor I merged with the police building.


I have created a loop setting the a key frame at 0, then move to 10 on the timeline and rotated the text 180 degrees, then repeated this at 20.

Then by using the curve editor and selecting the param curve : relative repeat


this created a loop on the video


This was imported into the police building file, making sure I selected the merge option and group the elements of the light. once imported I made a copy and changed the text.
 
 
This screen shot shows the two neon and the imported vehicle.  I added two target cameras, placing the target onto the points that I wanted to be within the camera view at all times.  By placing one target inside the building I was able to move the camera and view the building where ever it was moved too.
 
I had problems with the vehicle attached to a spline on a constraints path, so I created a dummy and  attached that to the constraint path, then attached the vehicle to the dummy.  This meant that I could animate the vehicle within the keyframes without effecting the path.
 
I also decided to change the direction of the vehicle, so changing the story board,  I felt that the scene worked better with the vehicle coming in from above and moving out of shot lower down the building, this also meant that I could include the neon within the animation.


I created a dummy from the helpers toolbar drew a cuboid and named this.  Created a path constraint with the dummy and the spline. Then attached the vehicle to the dummy.  I was able to move the vehicle to where I wanted knowing that this will still follow the path.

To place the dummy (and vehicle) on to a selected point on the spline I selected the object with the path constraint in this case the dummy, then under the motion, path parameters changed the '% along path' option, once in place creating a key frame.  This works, moving the dummy with the move tool means it will jump back and forth when trying to animate.

As I have fine tuned the camera movement, selecting the best camera settings to give the view that I wanted, I have know created a scene show casing the building and the neons, now to include the vehicle within the scene.

I have decided to render smaller parts of this whole file this means that I can manipulate the vehicle within these smaller time spans. As I will not be changing the camera angles I should be able to bring the files together within PremierPro. I set up the vehicle and rendered these scenes and brought them together in PremierPro

For the background I tried various things using this bitmap image but they didn't work


Source of gif : milkshake.com,[online] available at : http://mlkshk.com/p/2IB1 accessed 30/4/2013
 
 
using the dome or plane but the bitmap would not fit did not give the right effect.
 
Therefore I decided to use an environment map on the background using the same bitmap as scene 1 and 2, I felt this worked better.


Monday, 29 April 2013

Premier Pro for avi files

Scene 2

For scene 2 -  I had to create a new building, add a dome for the sky and import the spinner vehicle

I had to flip the image on the dome to show on the inside- in editable poly uner edit polygons.


I practised with lighting using the omni lights to create some shadows on the buildings, I wanted a shadow of the vehicle to show on the building as it went accross but my vehicles would have caused too large a shadow.


Testing the lignting using omni and atmospheres and effects using selecting volume light
Attached an omi light to the vehicle


I was not happy with the effect so I added a floor to help capture the light, moved the lights into a better position and made the dome smaller to get a better effect from the map.


File Structure

I restructured my files for the final animation to allow me to know where images for maps, sound files and video files can be accessed without confusion.


I have place the jpg files in the texture folders, this means file links are not lost on importing/merging  models into new scenes.

Thursday, 25 April 2013

Blinking lights

blinking lights
To create blinking lights to loop on the car and import that repeated animation into another file I followed this tutorial:
CJCA915, Chris's Corner, Blinking Lights in 3ds Max, [online]available at


To create this blinking effect the lighted areas on the vehicle were given the brightest settings and  key frames were created on the time line at intervals of 20 seconds, starting at 0.


Going back to the timeline and moving to the 10 second interval the settings were changed on the opacity within the motion editor for the mode that was assigned to the lighted areas on the vehicle.  A key frames was then created - this was then repeated for each further 20 second intervals ie: 30, 50 etc.


I feel that this is not a very good way of producing a flashing light as the opacity setting will allow the background to be seen through the selected area. 

But for this video the vehicle is moving too fast for the viewer to see the opacity created on the lighted areas and therefore it is not that noticeable. 


Slate Material Editor


I have been using the slate material editor with more confidence along with the select by name option on the toolbar to assign different maps to named parts in the scene.

I


Reactor


To use the reactor option : bring up the reactor toolbar (right click on edge of main toolbar) or click on the hammer and choose reactor
On the reactor tool bar there a many option to play with the first is using the rigid body collection (building blocks)
I have drawn 2 rectangles and 2 spheres the aim is to have the spheres fall and run down the planks, the larger sphere will react differently to the smaller sphere.
Select the rigid body collection and on the command toolbar add the objects that  will react together.
On the property editor select an object and add different properties to it.
I added unyeilding to the rectangles this stops them from moving when reacting with the objects.  To the spheres I added bounding sphere, the larger ball had a mass of 5 and the smaller a mass of 15, this created more of a reaction within the larger sphere.
The animation can be previewed by clicking on the last but one button (preview animation)


As you can see the objects reacted differently to the surroundings.

Tuesday, 9 April 2013

Creating scene one landscape and explosions

I have found a night sky jpeg that I could test the enviroment map with from wikimedia commons

 
Wikimedia Commons, 2006, File:Mountain night sky - West Virginia - ForestWander.jpg, available at : http://upload.wikimedia.org/wikipedia/commons/3/3f/Mountain_night_sky_-_West_Virginia_-_ForestWander.jpg, Accessed 21/3/2013


By creating a sphere and deleting half, then deleting the bottom part to give a straight line to act as a horizon line, a bitmap sky scene could be assigned to it


The bitmap image automatically shows on the outside for the inside the flip option is required.

For this scene I created some cones to act as a sort of chimney which will have explosion from the top(above)
(below) a spline was created for the vehicle to follow on a path constraint.
This was extremely difficult to draw as a free hand object, but I was able to manipulate the line into a more curved shape.


For the explosions I followed my tutorial notes see explosions and fire.


I have added a camera to view the render and add a slightly pan to give more depth to this part of the animation


the bottom two views are on the left camera 1 and on the right perspective.

I have changed the animation to set the speed of the asteroid and added a pan to camera 1.

My output settings  are HDTV 1280 x 720 25 fps


Thursday, 21 March 2013

Explosions and fire

I will need to add explosions to my animation, so I will be experimenting with this

first drawing a sphere, selecting it then shapes, particle system and PArray, then pick object and selecting the object, this gives the explosion particles it that shape (in this case spherical)


When moving the timeline along the particles move outwards

Then by selecting the object make changes in the

rotation and collision :

particle generation :

particle type :  change to object fragments

Object fragment controls : number of chunks  minimum

Now to give the explosion select the Helpers tab (tapemeasure) Atmospheric Apparatus and spheregizmo, surround the object (sphere) with this.


hide the original object then this will show just the explosions

This can also be used for bubbles


To add fire effect

Helpers, Atmospheric Apparatus, SphereGizmo, draw gizmo, go back to modify and add fire effect, click setup to make changes to the fire effect itself.


This effect did not work as well as I had hoped, I found a different way of producing fire from:

Frankland, Rhys, 2013, 3DS Max Fire, Available at http://starmax3d.blogspot.co.uk/2013/04/normal-0-false-false-false-en-gb-x-none.html, Accessed18th April, 2013

By using the superspray in the create, particles menu, I was able to try out different option settings to create a fire explosion suitable for my requirements.


Draw the Superspray emitter (the size of this can be changed) 


SuperSpray -  particle formation - display icon - this effects the area in which the flame grows to.

Particle Generation - various settings to change the start, end and display time is here
I selected the use rate option at 10, by putting the emit start at a minus number allows the fire to have already started in render.   Particle size and variation can be changed to effect the fire particles.

Rotation and Collision is the other area that I changed the spin speed of the fire particles.

Adding an explosion to the using a sphere gizmo adding fire effect and selecting explosion with tendrils should increase the intensity of the explosion in the final render.


For the large explosion at the front of the screen I increased the particle number to 10,000 and change the particle, this did create a good effect but I would need to practice for longer to create a perfect explosion with a better fire effect, although the explosion does fit with the cartoon effect of the rest of the models.  I added smoke explosion to this which does work.


Limbs and biped

Creating a limb

To create a limb movement:
 
 
I have created a cylinder which I will add a limb movement to
 
Select systems, bones option,
 
IKHI solver gives you many joints, the IK limbs give 3 joints as in  arms, legs.


Draw and click the joints in place, this object will now be given 5 joints, move the limb inside the shape
 
Select the shape go to modifier list and select skin, on the bones menu click add, highlight all of the bones and select, now the segments of the limb can move and thus it will move the object surrounding it. (you will need to change the object view to wireframe so you can select the sections of the bones, thankyou Carl)
It is quite difficult to select the limb object within the shape, to make it easier a dummy can be attached to the limb but placed outside the object, therefore when moving the dummy it moves the part of the limb it is attached to.
 
A thought is that if an object has a limb would it follow an animation path in a better way?
 
Creating a biped - model with a skeleton


First creating a basic model in the shape of a humanoid, starting with a rectangle and extruding limbs only one side, having the limbs extruding away from the body in this star shape makes life a lot easier later when attaching the biped

locate create - systems menu there are some different options one is bonees but for this model I am using the biped tool, draw the skeleton to the size required to fit the model

Use symmetry to create the other side of the model, and its best to use the wire frame view

Move the biped into place making sure that the parts of the biped fit to the model, this is done by moving the small areas at the end of the biped (skeleton) limbs. 


Select model add physique in modifier list, use the attach to node option, increase view and click on the pelvic area of the biped, when the lines turn orange it is complete the model now has a biped.
This allows the skeleton to move the mesh, use the envelope option under physique to shape the the mesh to the skeleton, this can easily go wrong so patience is required.
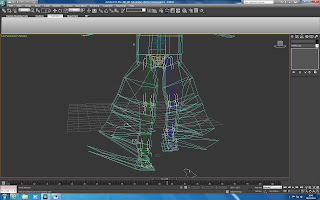
This shows that the skeleton has not been enveloped properly therefore the mesh is dragging
The envelope radial scale can be increased to include the mesh surrounding it, you can see the mesh snap to the envelope as the radila scale is changed up.  Unfortunately if the envelope selects a different part of the body it drags the mesh.
Once the model has the biped enveloped properly there are tools to use to create a movement path which can be modified to walk or run, this is very useful.  This movement can also be adapted to move the biped up and down stairs.
I was able to create my man and get him to move but forgetting to save regularly meant that when it went wrong i was not able to go back to the working model.


Thursday, 14 March 2013

Rendering out the animation

Rendering


There is a time configuration selection in the menu bar bottom right this allows changes to be made with the timings and frame rate.

To render out the animation


Render / Render setup this brings up the default scanline renderer

you can render the whole timeframe by selecting the "active time segment" or select a range or frames, output size and various other options,  Render output to a file destination and name then Click the Render button.

Rendering takes up a lot of time as there is a lot of detail to be rendered out.

Camera and animation

Cameras

Adding cameras gives a controlled set of views to capture the animation

using the camera option and selecting Target and placing the camera on the viewport and selecting the target to record

This can be assigned to a path :

draw the required line or even a circle, select the camera choose Animation / Constraints / Path Constraints  and then select the line or circle, the camera will then follow the line.


This shows the camera angle on the blue path, the spheres have also been attached to different paths:


Animation

Animating the object is relatively easy I found compared to 2D animation,

once the object is drawn and selected the timeline is available

by moving the slider along to the the frame required, then using the set key option (allowing more control over the animation than the autokey option) click the large key to set a marker in framesetm move the slider to the next frame position then move the object to the required position click the large key again and so on - when completed turn off the set key option.

To add more movement control, smoothness etc, open the Track view - Curve editor under the Graph Editor tab.  This allows control over the movement between the set frames already created using the set key.

Within this area a visibility and note track can be added under tracks - the visibility can make the object appear and disappear along the timeline.

The control is over the xyz positioning of the object under position, rotation and scale.


Thursday, 7 March 2013

Final Models

My Final Models


Spinner Vehicle
The only view I am less impressed with is the top view but for my animtion I did not intend on using this view therefore I have not spent any unnecessary time on this.

This model has taken my around 16 hours to create, about a third of this was trying new ways to create the desired look and effect.

The symmetry option saved a lot of time and probably a lot of frustration in creating both sides to appear the same.  There is one problem with symmetry that I have and that is using text or numbers, the mirrored image they are of course reversed.

Spinner original image
 
Police Building
 
This final model is not as good as I would have liked but I have learnt a lot in trying to create this, I feel that I could recreate this model in a resonable time and with more detail.  I like the glow on the lighting and the use of the marble map effect, the clone worked well with the revolve especially after I learnt how to move the pivot point.  Because of the problems I had in the beginning the final model is slightly of center.  I need to add more lighting to the lower levels of the building.  Although this is annoying the model is a static object an will not be moving this should be good enough for the animation, I hope.
 
Original Police Building on Blade Runner poster
 
 
Neon Lights
 
I am very happy with these neon lights, the glow and self illumination work exceptionally well with the green and blue colour.  For the wire sphere I thought this would be quite hard to create but it was nothing more than selecting the wire frame option in the material editor.  The arrow works well and I am hoping to have the text revolving in the animation.
 
This is my own creation - a bit on the futuristic side that these wil float in the air using gps to stay in one place.