Thursday, 21 March 2013

Explosions and fire

I will need to add explosions to my animation, so I will be experimenting with this

first drawing a sphere, selecting it then shapes, particle system and PArray, then pick object and selecting the object, this gives the explosion particles it that shape (in this case spherical)


When moving the timeline along the particles move outwards

Then by selecting the object make changes in the

rotation and collision :

particle generation :

particle type :  change to object fragments

Object fragment controls : number of chunks  minimum

Now to give the explosion select the Helpers tab (tapemeasure) Atmospheric Apparatus and spheregizmo, surround the object (sphere) with this.


hide the original object then this will show just the explosions

This can also be used for bubbles


To add fire effect

Helpers, Atmospheric Apparatus, SphereGizmo, draw gizmo, go back to modify and add fire effect, click setup to make changes to the fire effect itself.


This effect did not work as well as I had hoped, I found a different way of producing fire from:

Frankland, Rhys, 2013, 3DS Max Fire, Available at http://starmax3d.blogspot.co.uk/2013/04/normal-0-false-false-false-en-gb-x-none.html, Accessed18th April, 2013

By using the superspray in the create, particles menu, I was able to try out different option settings to create a fire explosion suitable for my requirements.


Draw the Superspray emitter (the size of this can be changed) 


SuperSpray -  particle formation - display icon - this effects the area in which the flame grows to.

Particle Generation - various settings to change the start, end and display time is here
I selected the use rate option at 10, by putting the emit start at a minus number allows the fire to have already started in render.   Particle size and variation can be changed to effect the fire particles.

Rotation and Collision is the other area that I changed the spin speed of the fire particles.

Adding an explosion to the using a sphere gizmo adding fire effect and selecting explosion with tendrils should increase the intensity of the explosion in the final render.


For the large explosion at the front of the screen I increased the particle number to 10,000 and change the particle, this did create a good effect but I would need to practice for longer to create a perfect explosion with a better fire effect, although the explosion does fit with the cartoon effect of the rest of the models.  I added smoke explosion to this which does work.


Limbs and biped

Creating a limb

To create a limb movement:
 
 
I have created a cylinder which I will add a limb movement to
 
Select systems, bones option,
 
IKHI solver gives you many joints, the IK limbs give 3 joints as in  arms, legs.


Draw and click the joints in place, this object will now be given 5 joints, move the limb inside the shape
 
Select the shape go to modifier list and select skin, on the bones menu click add, highlight all of the bones and select, now the segments of the limb can move and thus it will move the object surrounding it. (you will need to change the object view to wireframe so you can select the sections of the bones, thankyou Carl)
It is quite difficult to select the limb object within the shape, to make it easier a dummy can be attached to the limb but placed outside the object, therefore when moving the dummy it moves the part of the limb it is attached to.
 
A thought is that if an object has a limb would it follow an animation path in a better way?
 
Creating a biped - model with a skeleton


First creating a basic model in the shape of a humanoid, starting with a rectangle and extruding limbs only one side, having the limbs extruding away from the body in this star shape makes life a lot easier later when attaching the biped

locate create - systems menu there are some different options one is bonees but for this model I am using the biped tool, draw the skeleton to the size required to fit the model

Use symmetry to create the other side of the model, and its best to use the wire frame view

Move the biped into place making sure that the parts of the biped fit to the model, this is done by moving the small areas at the end of the biped (skeleton) limbs. 


Select model add physique in modifier list, use the attach to node option, increase view and click on the pelvic area of the biped, when the lines turn orange it is complete the model now has a biped.
This allows the skeleton to move the mesh, use the envelope option under physique to shape the the mesh to the skeleton, this can easily go wrong so patience is required.
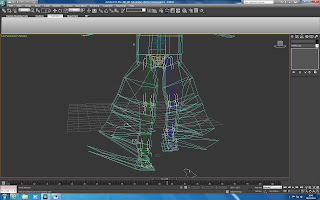
This shows that the skeleton has not been enveloped properly therefore the mesh is dragging
The envelope radial scale can be increased to include the mesh surrounding it, you can see the mesh snap to the envelope as the radila scale is changed up.  Unfortunately if the envelope selects a different part of the body it drags the mesh.
Once the model has the biped enveloped properly there are tools to use to create a movement path which can be modified to walk or run, this is very useful.  This movement can also be adapted to move the biped up and down stairs.
I was able to create my man and get him to move but forgetting to save regularly meant that when it went wrong i was not able to go back to the working model.


Thursday, 14 March 2013

Rendering out the animation

Rendering


There is a time configuration selection in the menu bar bottom right this allows changes to be made with the timings and frame rate.

To render out the animation


Render / Render setup this brings up the default scanline renderer

you can render the whole timeframe by selecting the "active time segment" or select a range or frames, output size and various other options,  Render output to a file destination and name then Click the Render button.

Rendering takes up a lot of time as there is a lot of detail to be rendered out.

Camera and animation

Cameras

Adding cameras gives a controlled set of views to capture the animation

using the camera option and selecting Target and placing the camera on the viewport and selecting the target to record

This can be assigned to a path :

draw the required line or even a circle, select the camera choose Animation / Constraints / Path Constraints  and then select the line or circle, the camera will then follow the line.


This shows the camera angle on the blue path, the spheres have also been attached to different paths:


Animation

Animating the object is relatively easy I found compared to 2D animation,

once the object is drawn and selected the timeline is available

by moving the slider along to the the frame required, then using the set key option (allowing more control over the animation than the autokey option) click the large key to set a marker in framesetm move the slider to the next frame position then move the object to the required position click the large key again and so on - when completed turn off the set key option.

To add more movement control, smoothness etc, open the Track view - Curve editor under the Graph Editor tab.  This allows control over the movement between the set frames already created using the set key.

Within this area a visibility and note track can be added under tracks - the visibility can make the object appear and disappear along the timeline.

The control is over the xyz positioning of the object under position, rotation and scale.


Thursday, 7 March 2013

Final Models

My Final Models


Spinner Vehicle
The only view I am less impressed with is the top view but for my animtion I did not intend on using this view therefore I have not spent any unnecessary time on this.

This model has taken my around 16 hours to create, about a third of this was trying new ways to create the desired look and effect.

The symmetry option saved a lot of time and probably a lot of frustration in creating both sides to appear the same.  There is one problem with symmetry that I have and that is using text or numbers, the mirrored image they are of course reversed.

Spinner original image
 
Police Building
 
This final model is not as good as I would have liked but I have learnt a lot in trying to create this, I feel that I could recreate this model in a resonable time and with more detail.  I like the glow on the lighting and the use of the marble map effect, the clone worked well with the revolve especially after I learnt how to move the pivot point.  Because of the problems I had in the beginning the final model is slightly of center.  I need to add more lighting to the lower levels of the building.  Although this is annoying the model is a static object an will not be moving this should be good enough for the animation, I hope.
 
Original Police Building on Blade Runner poster
 
 
Neon Lights
 
I am very happy with these neon lights, the glow and self illumination work exceptionally well with the green and blue colour.  For the wire sphere I thought this would be quite hard to create but it was nothing more than selecting the wire frame option in the material editor.  The arrow works well and I am hoping to have the text revolving in the animation.
 
This is my own creation - a bit on the futuristic side that these wil float in the air using gps to stay in one place.


Mapping colour and images

I decided that the glass effect using the refraction did not work so I created some images to give the look of a reflection.( image 3)


The above texture and images were created in photoshop to use on the spinner giving a better effect than flat colour.  The blue is uneven and almost dirty which works well on the spinner.
 
The 3rd image above is being used a reflection so I have chenged the specular highlights on the map - the specular, glossiness and anistropy, I also changed the opacity. (see below)


 I have used the 44 image mapped to a small selection at the back of the vehicle, I have imported the image and added the opacity to the map.
 
 
This is the completed half of the spinner, I tried the mesh smooth but this was not the effect I wanted all over, I was able to able to use the smooth option to a selected area, this worked much better and I had more control over the effect.
 
I used the symmetry option on the y axis, removing the slice along mirror, I had to move the mirrored image to get the desired look.
 
Spinner final model


Monday, 4 March 2013

Creating the Spinner vehicle

I am going to use reference plates to create the model.

Blue prints are available at sites such as : http://www.the-blueprints.com/ 


I created 4 views of my model front side back and top in photoshop and saved as a bitmap

In 3dsmax I used the material editor - adding a bitmap and selecting the "show standard map in viewport" option, I created a plane then added the UVW map in the modifier list using the bitmap fit option and selecting the bitmap, then dragging the material editor view to the plane :

I tried to manipulate a box with many segments to reshape it but had a lot of trouble so I tried one box and using the vertices moved them to the basic shape of the model and the used the swiftloop to ad more vertices and moved them to create the shapes I wanted

USe "alt" x to make the shape transparent.

Once I had created the shape I needed for the spinner (only concentrating on one side of the model and added the wheels,  I used the symmetry mirror option to create the other side :

 
I accidentally saved the model with the symmetry included, therefore I could not continue with editing one side and it being replicated on the other, I found out how to delete only the unwanted parts - select the group of objects and convert to editable poly select the faces then select all of the object you want to delete.
 
I have added some maps to create different effects to the areas on the spinner
 
 
One effect I will try out is the glass effect that I tried out in the tutorial this does not show up to well on this screen shot but it may work once I have the right backgrounds.  If this still doesnt work I might try out the metallic effect.  Which I have put on the body of the vehicle.  I will include a mesh smooth on the body and will use symmetry mirror to replicate the other half.